How to Build an Ai Agent and What Tools to Use (From Gpts to Qodo)
TL;DR
- Traditional AI agents are built using models like GPT or Claude, guided by prompts that include context, documentation, tool descriptions, and user intent.
- Most custom agents require manual setup of prompt logic, tool integration, and event triggers, often resulting in fragile or one-off scripts.
- Qodo Command introduces a structured way to define and deploy AI coding agents across the software development lifecycle using a TOML-based config system.
- Agents can be triggered from CI/CD pipelines, terminal commands, or webhooks, and can automate tasks like debugging, code reviews, and release documentation.
- Qodo supports building purpose-driven agents without needing custom infrastructure, ideal for teams working across multi-language, Git-native environments.
- Unlike general-purpose agent frameworks, Qodo is optimized for production use, offering strong Git context, flexible deployment, and real-time SDLC integration.
When we hear the word “AI”, devs first think of generative AI, models that write code, create text, or generate images. It creates new content based on what we ask or prompt. But what about if we have to make the AI that can observe the codebase environment, decide what to do next, and actually perform tasks, often as part of larger software systems.
As a Senior Engineer myself, I have come to a point where I don’t need code completion assistance now. What I need is to automate repetitive dev workflows (like CI debug bots or automated release managers) or monitor production, identify anomalies, and trigger recovery steps. That’s where AI agents fundamentally differ from traditional generative AI. Unlike generative models that only respond to prompts, real AI agents are designed to act.
In this post, I’ll break down what makes AI agents different from typical generative AI tools, why they’re becoming a practical need for growing teams, and how to build them using the right tools, such as Qodo Command, for production-grade environments.
What are AI Agents?
Before getting started on how AI agents are built and how they can help your team, let’s get an overview of AI agents. These agents are software programs that are designed to perform tasks autonomously on behalf of a user or another system. They’re built more like systems that can watch what’s going on, make decisions, and take action on their own.
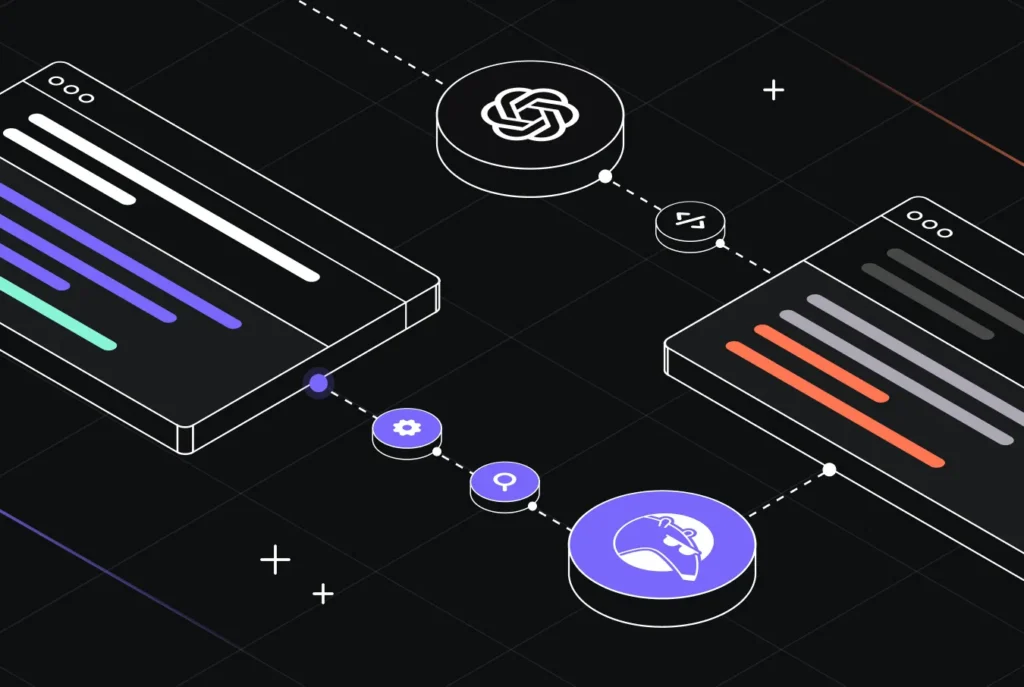
How Traditional AI Agents Are Built Using GPT or Claude
Modern AI agents are frequently built on large language models (LLMs) like OpenAI’s GPT. An LLM serves as the agent’s “brain,” processing language-based instructions and generating responses. Developers create prompts or instructions that guide the GPT model’s behavior.
For example, an agent’s prompt might define its role (e.g. “review this code”) and the desired style of output. Then the GPT model uses its knowledge to reason, plan, and respond step by step.
Below is an illustration of the key aspects of GPT-powered agents:
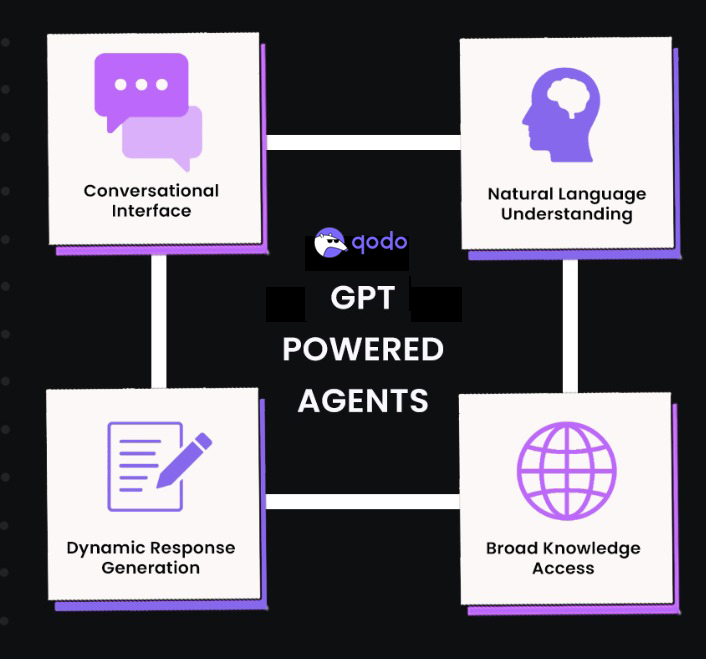
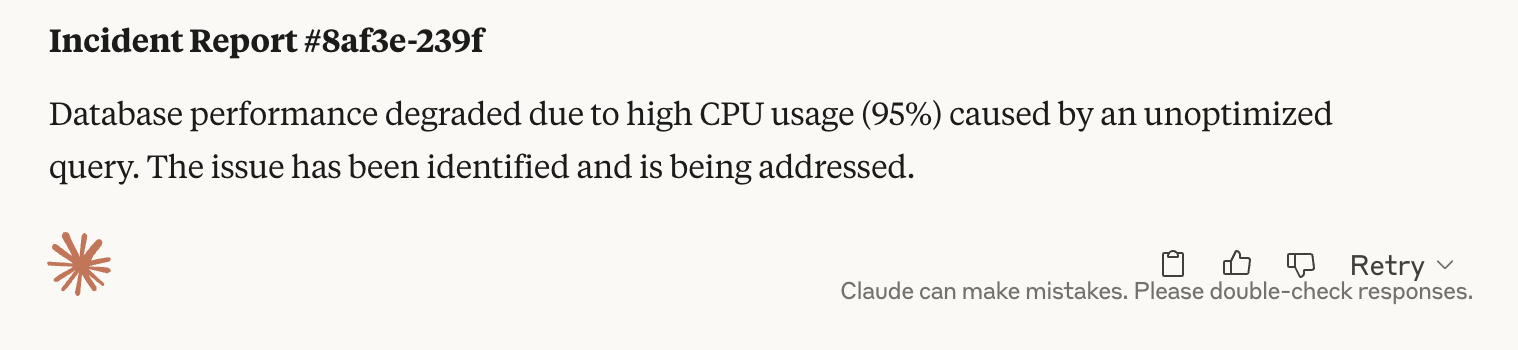
Most AI agents start with a deceptively simple core: a prompt. Under the hood, though, this prompt often carries much more than just user input. In traditional agent setups using models like OpenAI’s GPT or Anthropic’s Claude, the prompt acts as the full instruction set, the environment, the tools, the rules, and the request, all bundled into one carefully structured message.
For example, I included in the prompt:
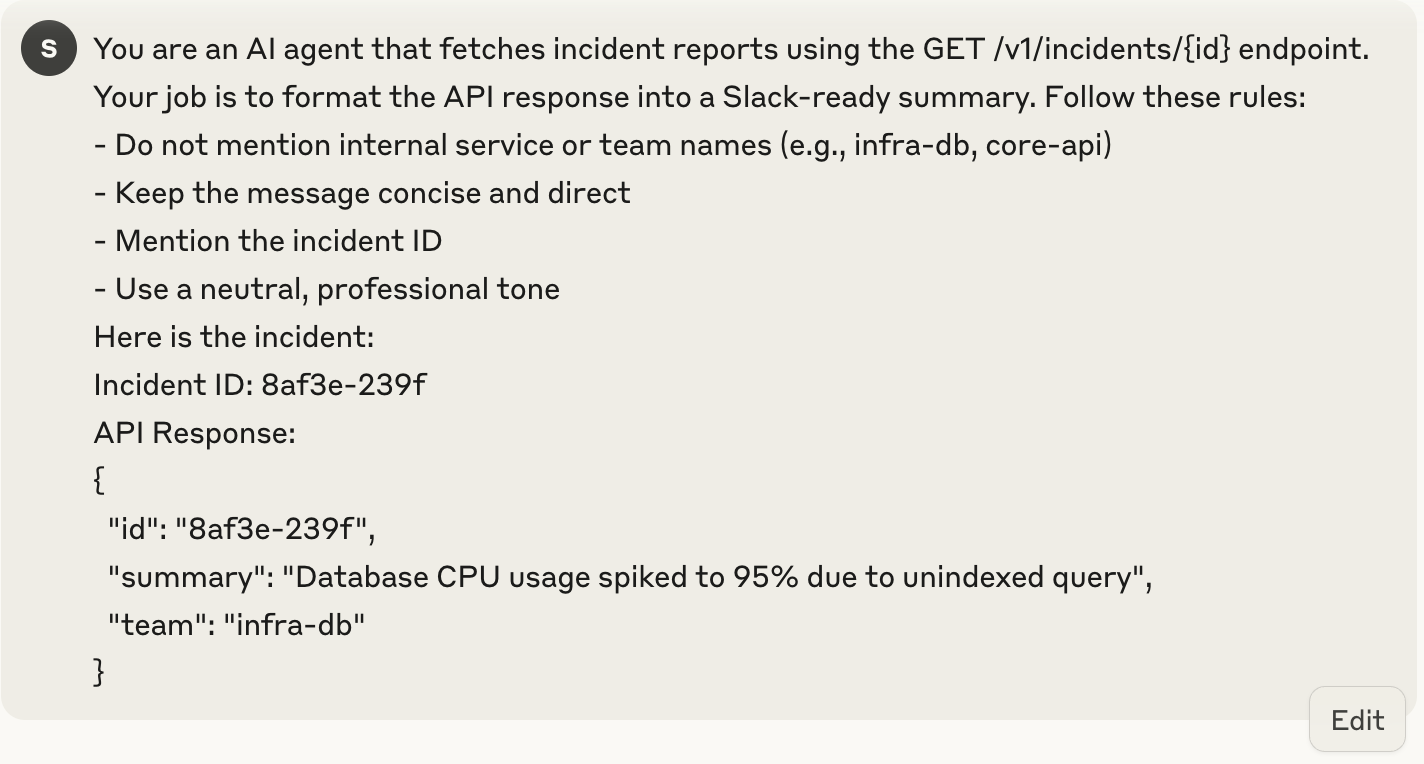
“You are an agent that fetches incident reports using the GET /v1/incidents/{id} endpoint. Format the result as a Slack-ready summary. Avoid mentioning internal service names.”
Alongside that, I include a sample API response and the user input (like an incident ID), and ask the model to return a message. Here is the output:
This works well for simple tasks. But when the workflow has many steps, tools, or rules, it becomes hard to manage. A single long prompt can easily break if the input or format changes even a little.
Agent frameworks like Qodo Command help solve this. They let me set tool behavior, define when the agent should stop, and handle inputs in a clean way. Even with GPT or Claude, the idea is the same: give the right context, explain the task, set clear rules, and manage the response.
Production-Grade Agents with Qodo Command
When I first needed to debug CI pipelines, such as tests or build steps that would fail intermittently, I was stitching together scripts and Slack alerts just to get visibility. But switching to Qodo Command helped me replace that mess with an agent that monitored GitHub Actions runs, fetched logs from failed jobs, and posted a structured summary directly to our Slack channel.
Instead of building custom infrastructure, I defined a CI failure debug agent using a simple .toml file. TOML files (Tom’s Obvious, Minimal Language) are files designed for defining configuration settings.
Here’s a snapshot of the .toml file that I have used in creating an agent. We’ll look into this deeper as we do the hands-on.

The agent ran directly in the pipeline, picked up the latest git diff, parsed stack traces from the failed job, and surfaced the likely root cause, often pointing back to an overlooked test setup or recent change.
How to Design Custom Agents with Qodo
At the core of every Qodo agent is a .toml configuration file. This file defines how the agent behaves, when it should trigger, what input it receives, what it does, and what output it returns. I’ve found this setup ideal when automating development tasks without spinning up new infrastructure.
To get started, you can just use the following command in your terminal
npm install -g @qodo/gen

Each agent configuration includes four key parts:
- Trigger: This defines when the agent should activate. For example, I set up an agent to trigger on a GitHub pull request event or after a CI pipeline fails.
- Input: The data the agent consumes. This could be the git diff, commit history, test logs, or a specific file path.
- Action: This section defines what the agent should do. Using tools and LLM prompts, it might generate documentation, suggest fixes, or identify untested paths.
- Result: The expected output. In my case, this could be a Markdown summary, code suggestions, or even a Git commit that gets pushed as a follow-up PR.
Let’s create an agent using Qodo Command that does simple tasks like file operations and code analysis:
Qodo provides a qodo create agent CLI command to scaffold new agents. This command is primarily a scaffolding utility. Its role is to help you quickly set up the boilerplate structure of an agent project, including files, folders, and a working Python script, to get you started faster.
If you are not logged in, you can first use the qodo login command and get started. Let’s see how to carry this out:
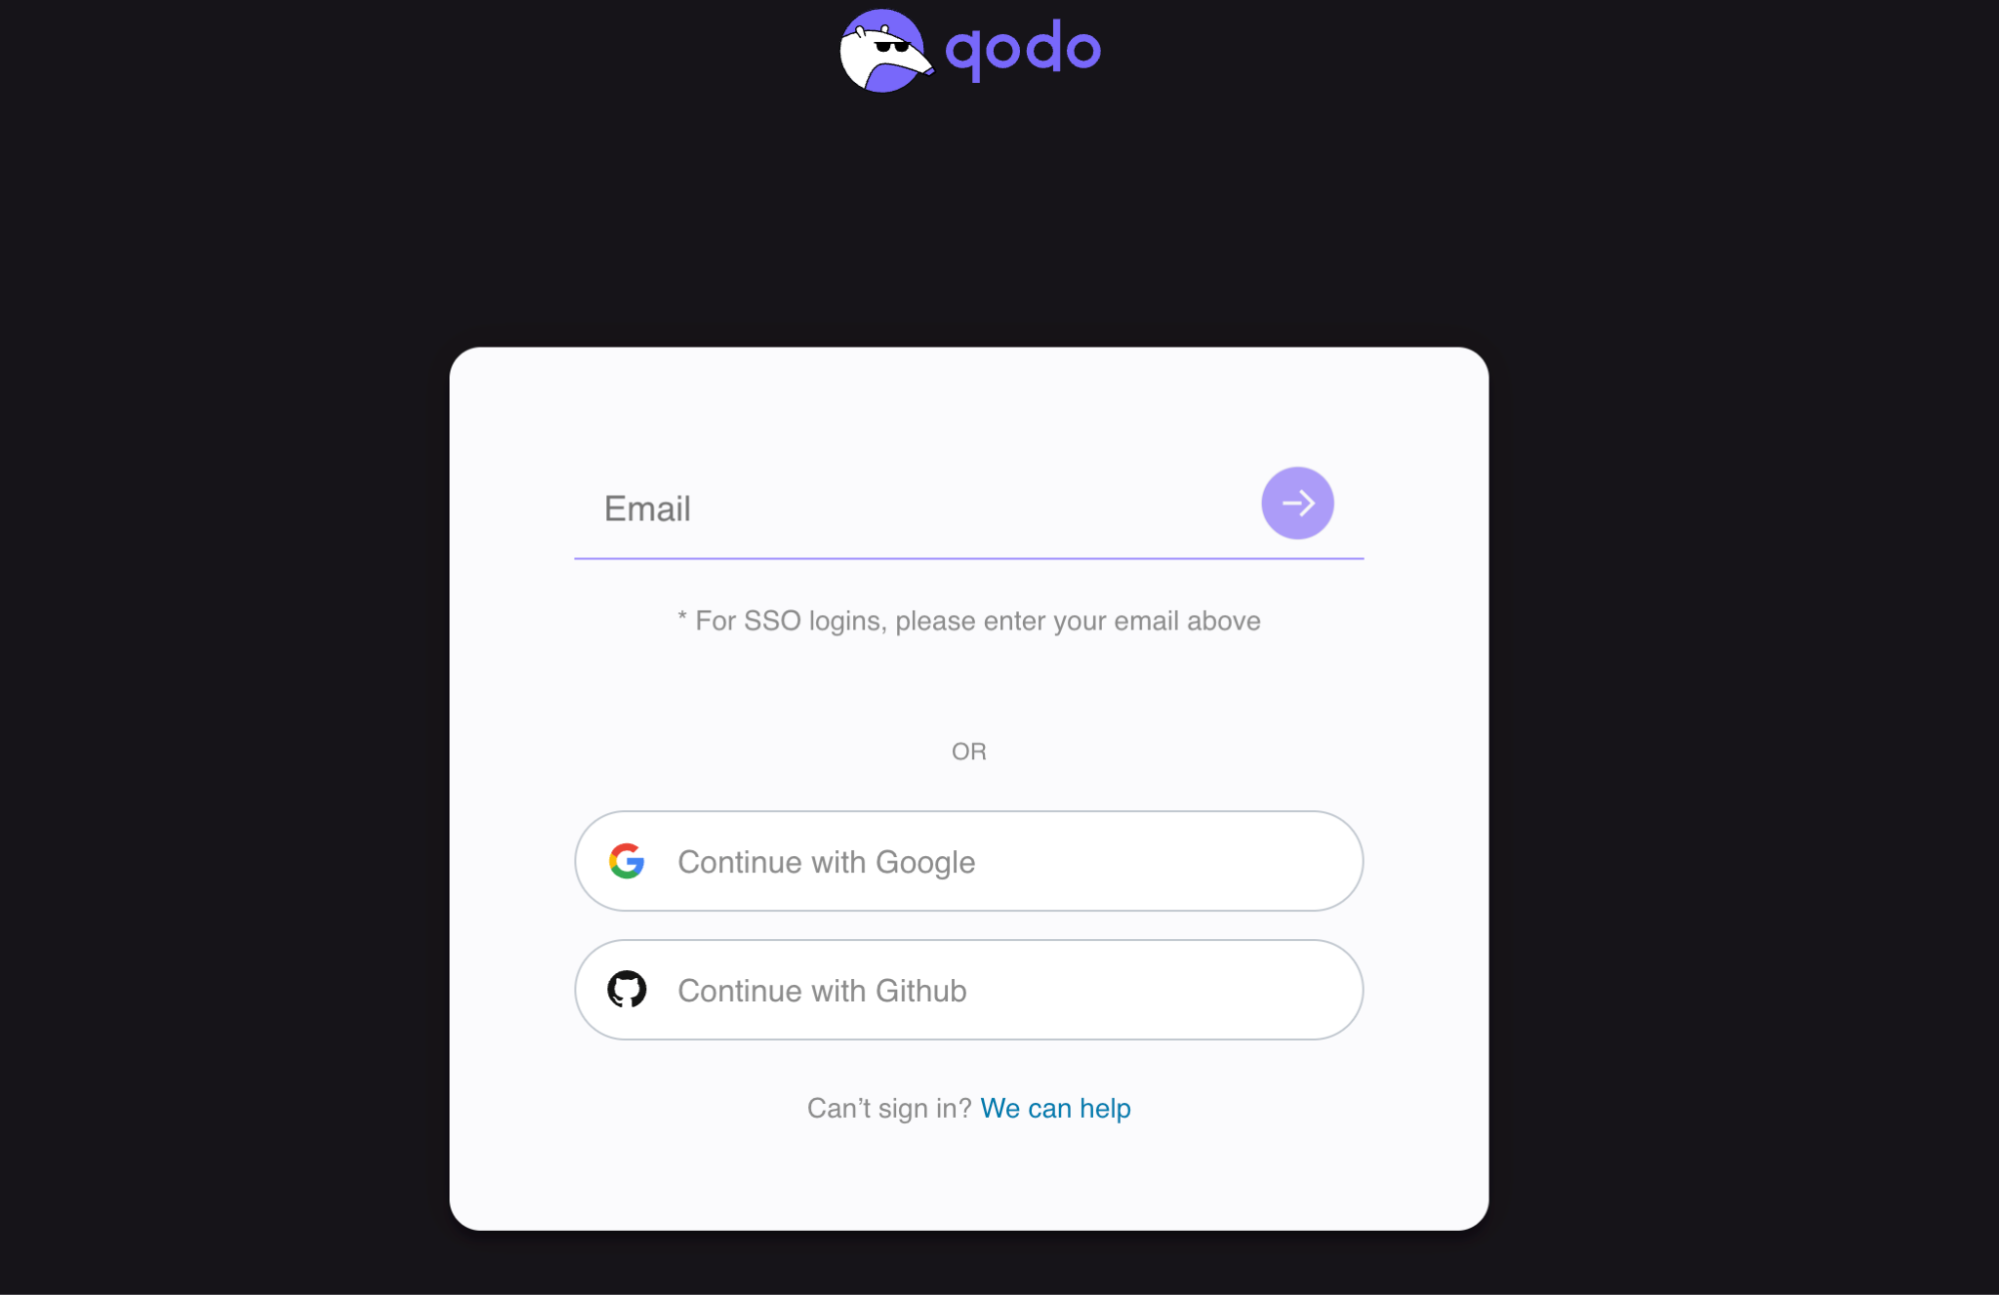
In order to first use Qodo Command, you need to be logged in. If you’re not, paste the below command in your terminal:
qodo login
As soon as you run this, you’ll be directed to your browser, which opens the login page of Qodo as shown below in the image:
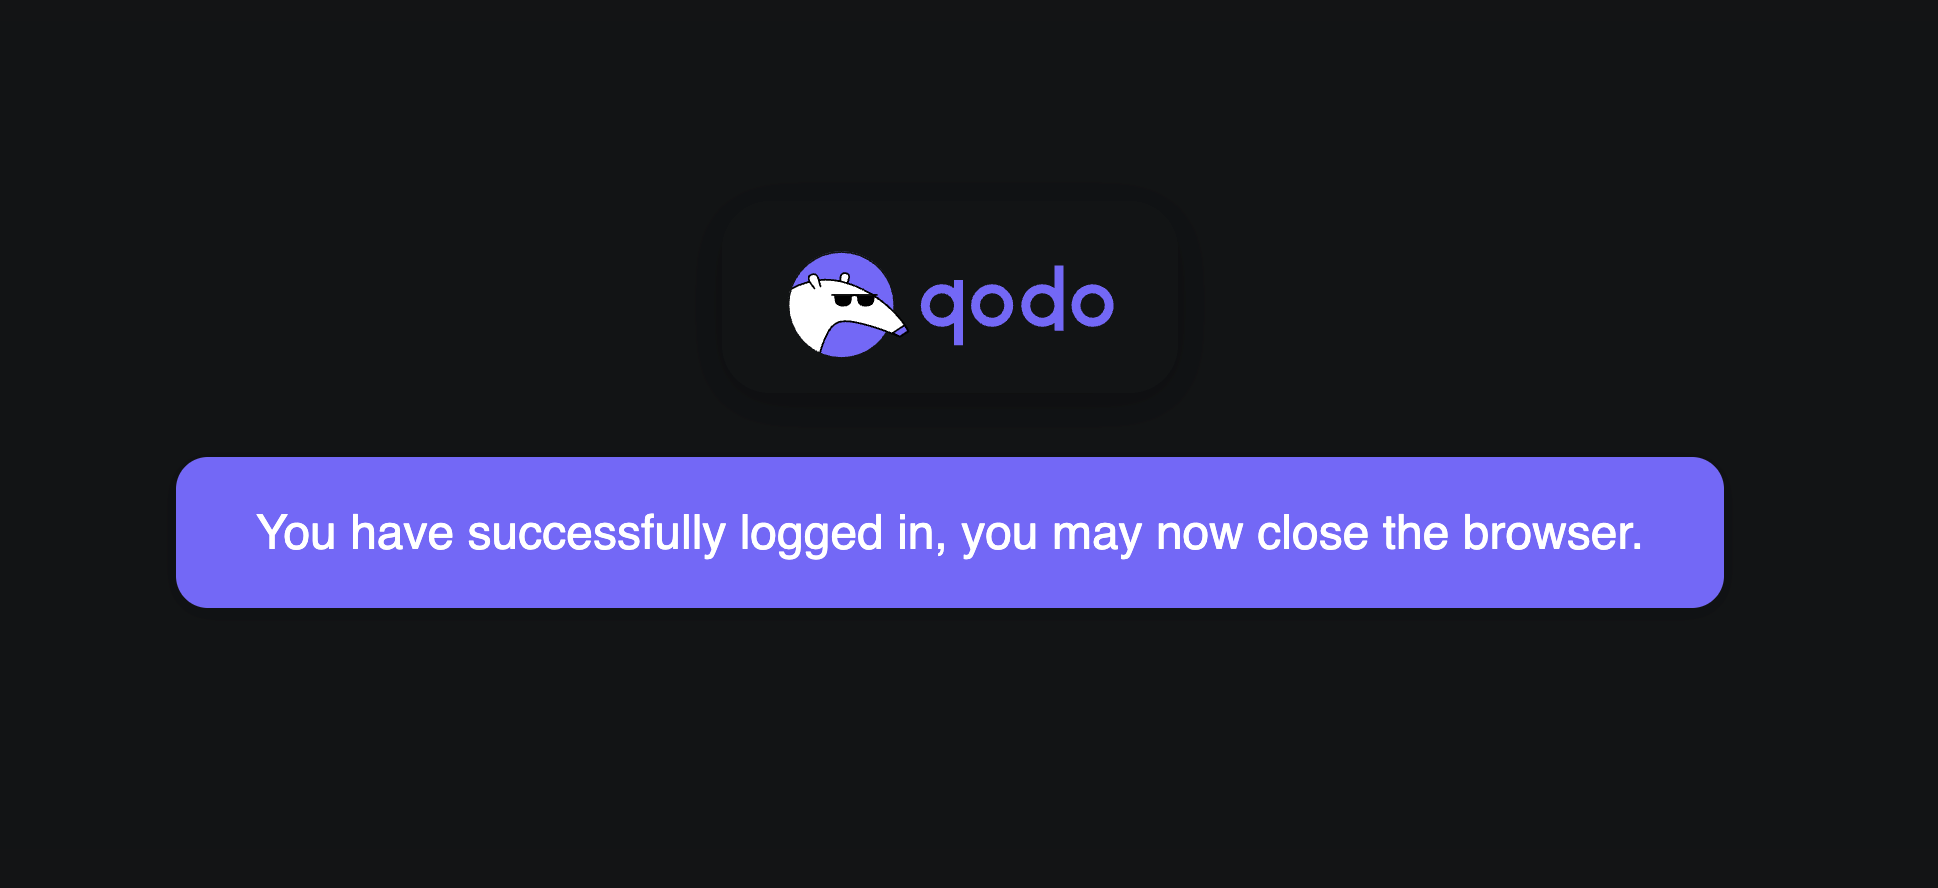
After logging in, your screen will look something like this:
Now you can navigate to your codebase and check your terminal. You can see that you have got your API key and the login is successful, as shown below:
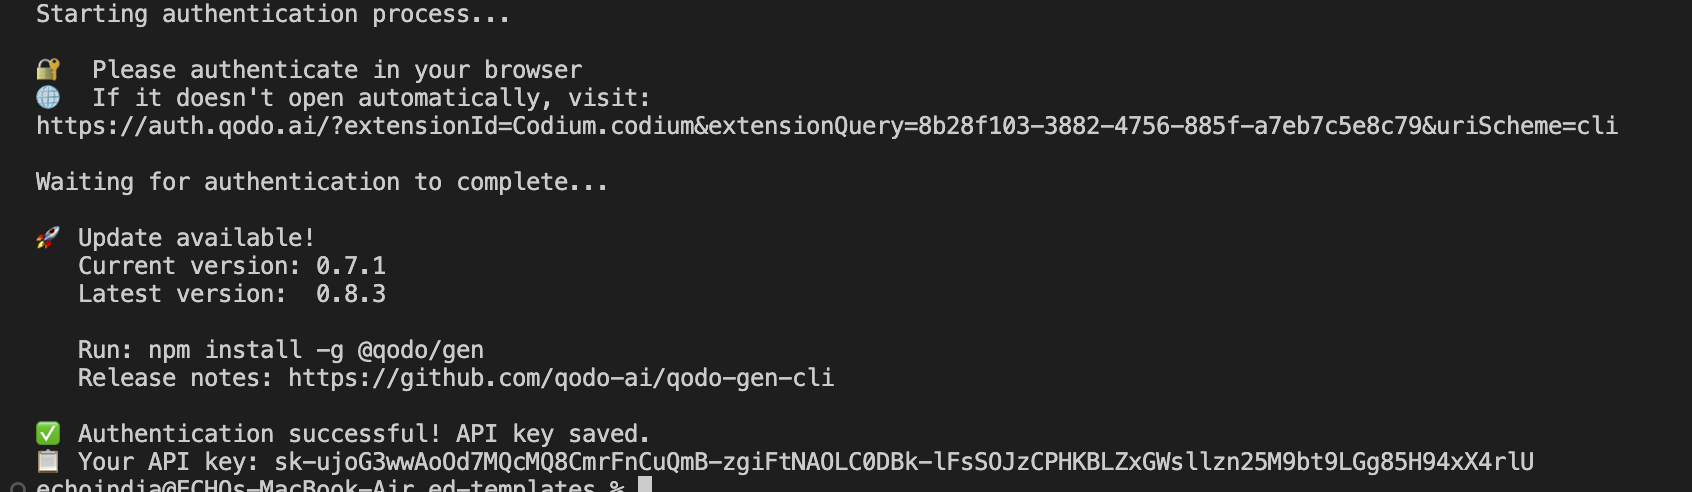
The API key is stored locally in the .qodo directory in your home folder and can be reused across sessions, including in CI pipelines. It’s linked to your user account and follows the same usage limits.
You can manage the key using a few dedicated commands:
- qodo key list # List all API keys
- qodo key create <name> # Create a new API key with the given name
- qodo key revoke <name> # Revoke an API key by name
Why the Agent Works Without .toml?
Now that you are successfully logged in, let’s see how we can create an agent in the sections below.
Setting up the .toml Configuration
To make your agent from a local Python script to a fully integrated Qodo Command, you’ll need to define its behavior using a .toml configuration file as we discussed above. This file serves as a formal contract; it tells Qodo what your agent does, what tools it can access, how to run it, and what output to expect.
We can start by creating a new file inside the agents folder with the same name as the command you want to run. For example:
mkdir -p agents
touch agents/ci_debugger.toml
Now, inside this file, we will define your agent’s metadata, instructions, and available tools. Here’s a basic skeleton that I created:
This configuration tells Qodo what the agent is for, how to trigger it (qodo ci_debugger), and which tools it can invoke under the hood.
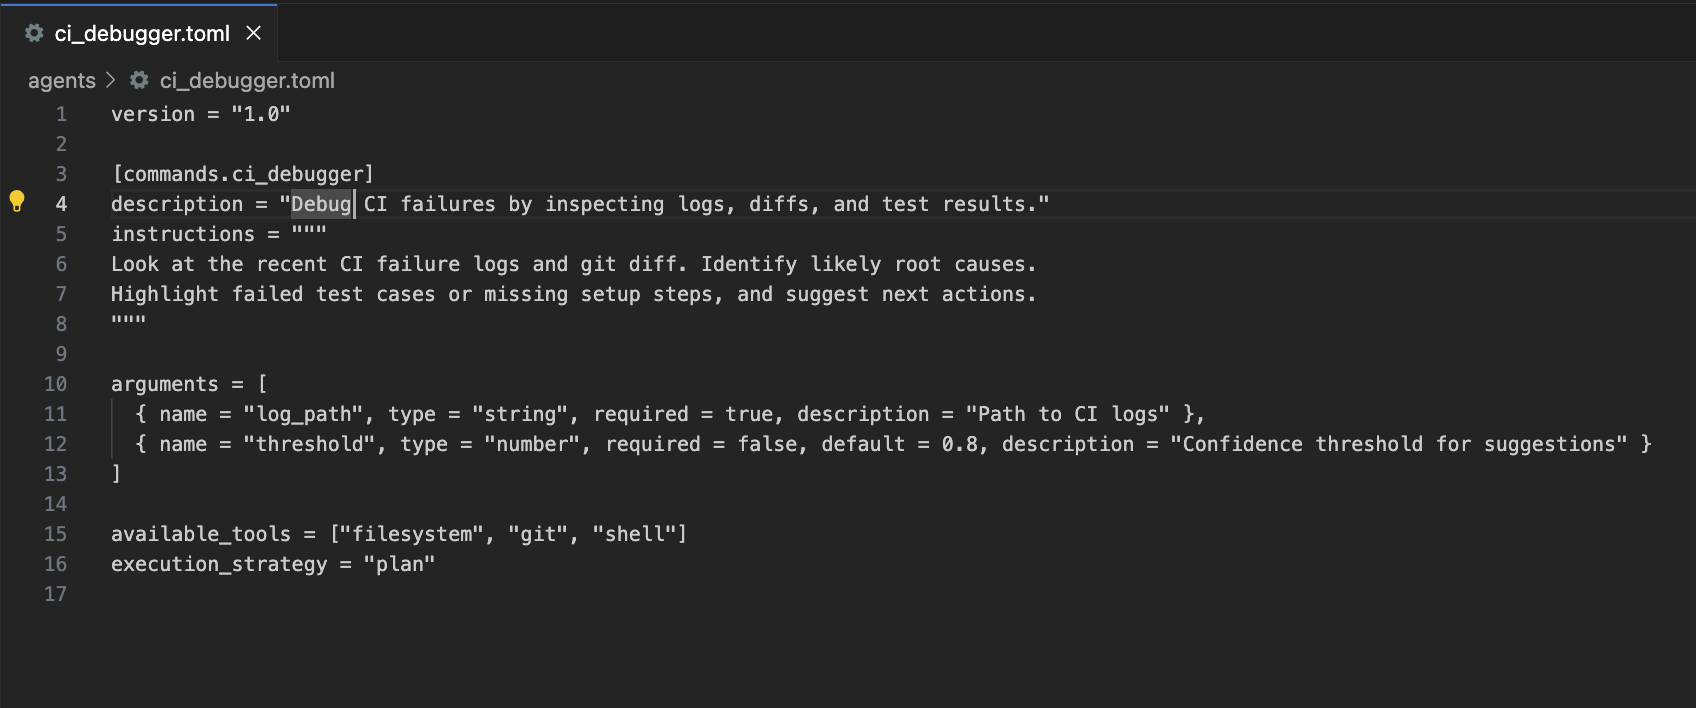
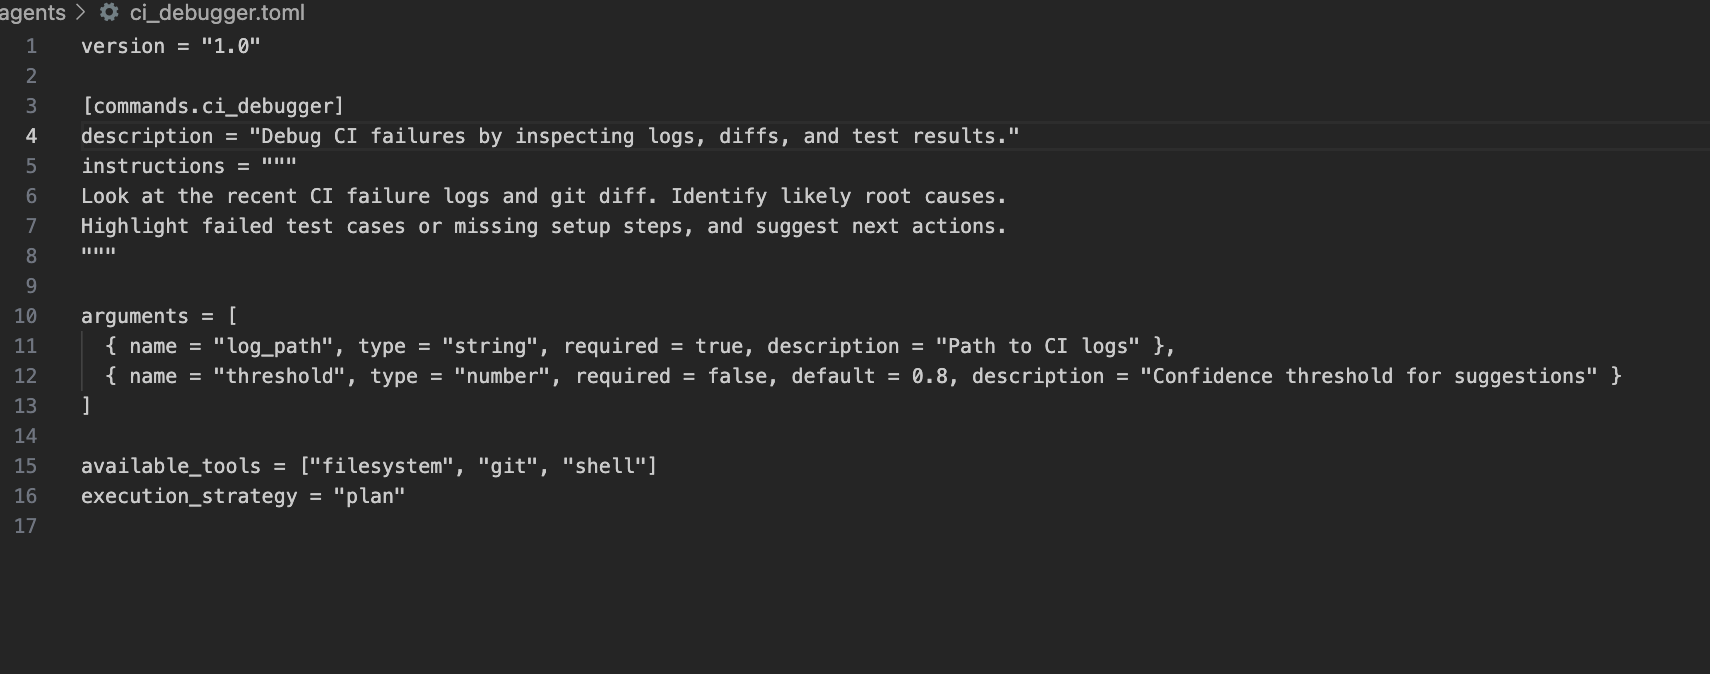
You can define the ci_debugger.toml file as per your task. For example, here’s what I created:
This is just one .toml file; you can write several agents for different tasks, and they serve different automation purposes. Each one can have its own instructions, tools, arguments, and execution strategy. I created 4 of them, and below is a small overview of the four agents and what they do:
| TOML File | Purpose |
| ci_debugger.toml | Debug failed CI jobs by inspecting logs and diffs |
| code_reviewer.toml | Review code for quality, performance, and security |
| coding_assistant.toml | General help with writing, fixing, or explaining code |
| project_scaffolder.toml | Create folders, config files, and project templates automatically |
Customize Your Agent
You can customize your agent by setting various attributes in the .toml file. These attributes determine the agent’s instructions, accepted arguments, linked tools, and runtime behavior. The configuration is flexible enough to support simple one-shot commands as well as multi-step workflows.
Make sure the file name matches the command you want to use (e.g., ci_debugger.toml for qodo ci_debugger) and that the same name appears in the commands field inside the file.
Here are the main fields you can use to configure your agent:
| Field | Purpose |
| description | Explains what the agent does (required for MCP usage). |
| instructions | Prompt text guiding the agent’s behavior (required). |
| arguments | Input values that the agent can accept. |
| mcpServers | Lists the MCP servers the agent will call. |
| available_tools | Restricts the tools the agent can access. |
| execution_strategy | Use act for direct execution or plan for step-by-step reasoning. |
| output_schema | Defines the structure of the agent’s output (in JSON). |
| exit_expression | Used in CI to determine if the agent run was successful. |
Registering Agents in agent.toml
Now, once the agent file is ready, register it inside the root-level agent.toml file. The agent.toml file acts as a registry of all available agents in your project. It tells Qodo Command which agent files exist and where to find them. When you run qodo <command-name>, Qodo checks this file to determine which .toml agent config to load.
The agent.toml file setup looks like:
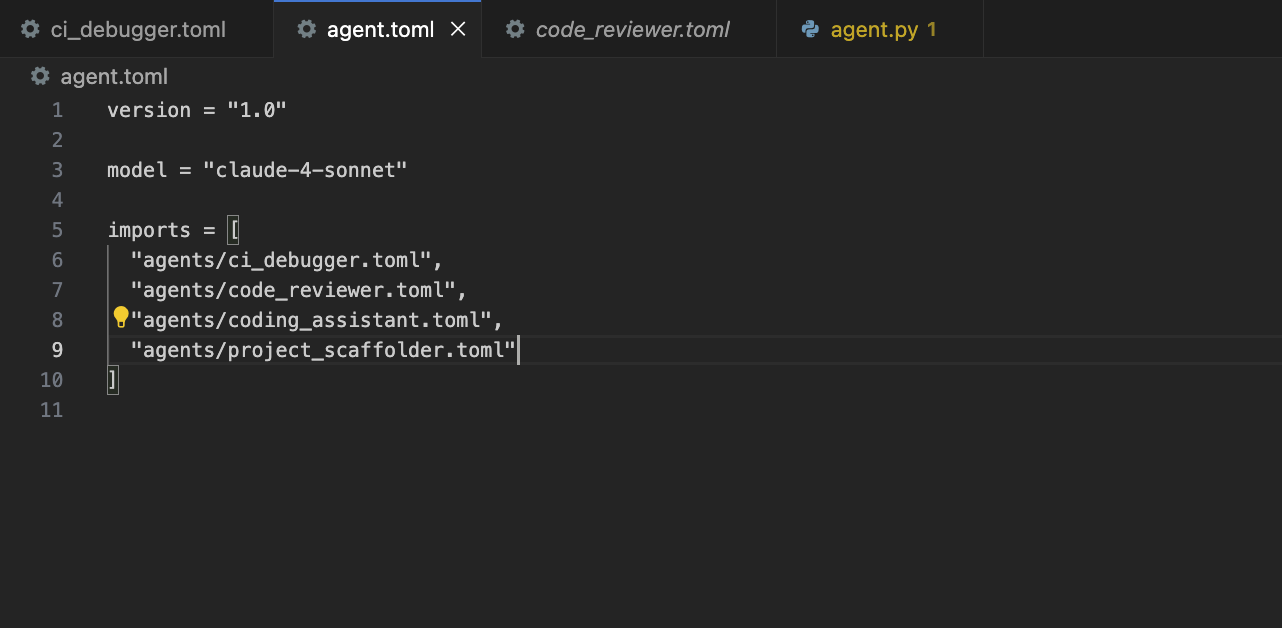
Basically, the agent.toml file tells Qodo that “these are the agents that I want to use”
To test the CI Debugger agent in a realistic scenario, I created a synthetic CI log file named dummy_log.txt. This file acts as a mock output from a CI/CD pipeline and helps validate whether the agent can correctly identify errors, warnings, and patterns.
The log captures typical stages of a CI workflow, such as dependency installation, testing, linting, documentation builds, and Docker deployment. It intentionally includes both successful steps (like passing tests or installing dependencies) and failure points (such as missing files, test exceptions, or linting issues).
Now, we can run the agents using qodo <your agent>. For example;
qodo ci_debugger –args ‘{“log_path”: “dummy_log.txt”, “threshold”: 0.8}’
The –args flag in Qodo expects a valid JSON string that matches the input parameters defined in your .toml configuration. This means your arguments must be wrapped in single quotes (to avoid shell conflicts) and structured as a key-value pair in JSON format.
After running the ci_debugger agent, Qodo generated a detailed ci_debug_report.md file inside my project directory. This file summarizes everything it found during the diagnostic run.
Here’s a snapshot of the report file:

We can see how Qodo Command noted down everything from test failures and linting warnings to missing documentation and Docker build issues. Moreover, you can run these agents in UI too. Let’s look into it in the next section!
Visual Debugging and Live Testing
After scaffolding the agent and ensuring the .toml file is correctly registered in agent.toml, you can use the Web UI for interactive testing:
qodo –ui
You can use this qodo –ui command in your terminal (after you have logged in.) If not, run the command qodo login. The command will run like the image attached below;
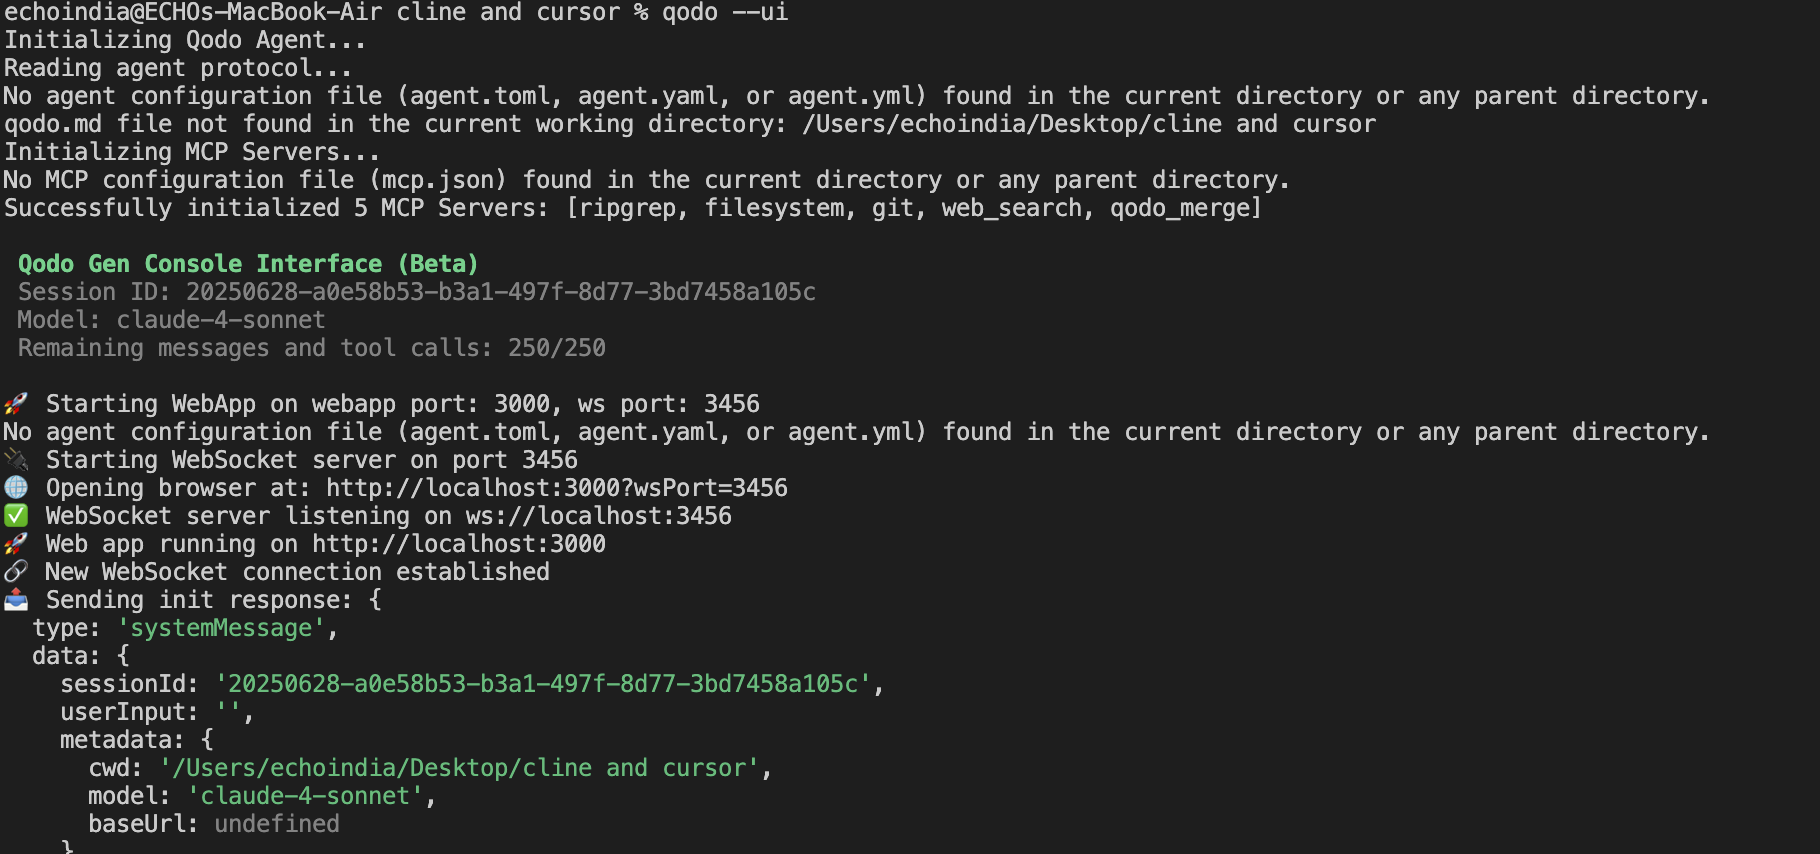
It opens a web-based interface that offers the same features as the CLI, but with a visual layer. You can view code changes, interact through a chat-style panel, and see structured outputs in real time.
It’s especially useful for developers who are comfortable with the terminal but prefer a more interactive way to test or fine-tune their agents. The interface is quick to load and runs without needing any extra configuration.
Designing agents with Qodo doesn’t require writing backend services or setting up new queues. Everything runs locally or within CI, making it easy to version, test, and refine your agents without overhead.
Using MCP Servers For Agents
When building AI agents that go beyond text generation, you often need them to interact with tools, run commands, or call APIs. That’s when MCP (Model Control Plane) servers can be really handy for your team. They act as secure, configurable execution backends that your agents can call into during runtime.
Instead of hardcoding logic into prompts or relying solely on language models, MCP servers give you a consistent interface to invoke real functionality, shell commands, Git operations, HTTP calls, and more, through structured configurations.
They let your agents access external tooling and runtime environments. You define them once in an mcp.json file, and they become available to all agents in your project.
Here’s an example of a mcp.json file:
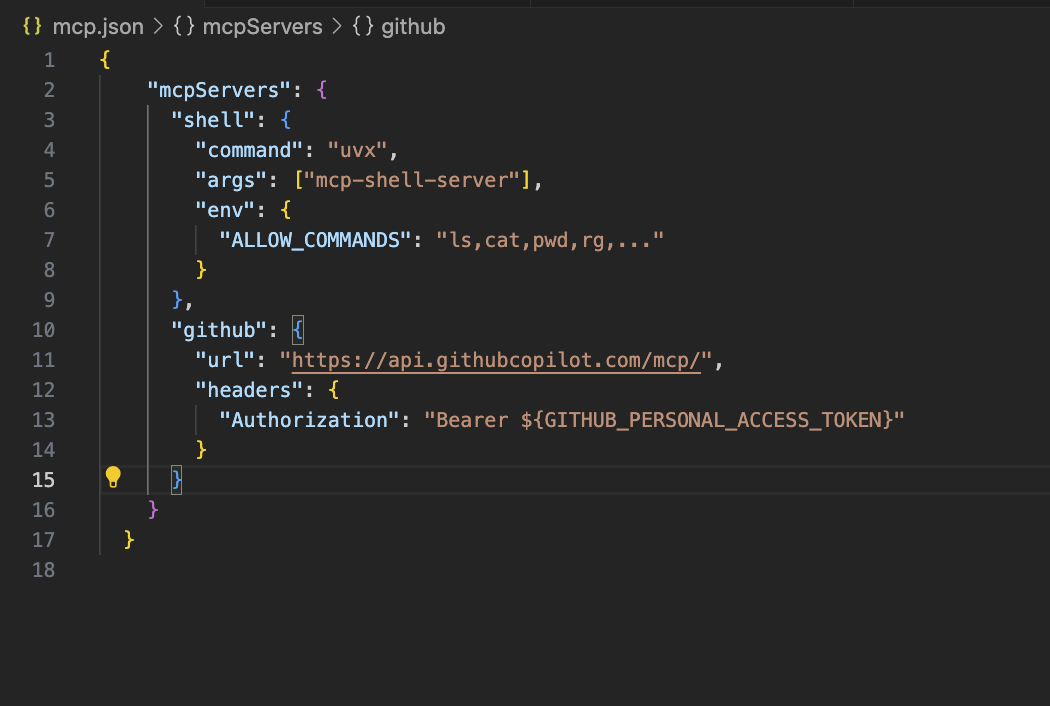
Once your servers are declared in mcp.json, you can use them in your agents’ .toml config under the available_tools section.
If an agent needs a unique server setup not shared across others, you can define it directly inside its own TOML config file instead. For servers that require credentials or sensitive data, you can pass environment variables or tokens through the Authorization header in mcp.json. This keeps your setup secure while allowing agents to work with authenticated services.
What Can I Do With Qodo Command?
With Qodo Command, I can build, run, and manage AI coding agents that automate real development workflows across the SDLC. These agents aren’t tied to an IDE or specific UI; they can operate from the terminal, integrate with CI pipelines, respond to webhooks, or act as callable services via MCP. I’ve used Qodo Command to:
- Automate code reviews: One of my agents runs on every PR, summarizes the changes, flags missing tests, and catches architectural issues. It helps reduce manual review cycles.
- Generate release notes: I configured an agent to scan merged commits and generate a structured summary for the RELEASE_NOTES.md file.
- Patch test coverage gaps: Another agent looks at uncovered lines in modified files, generates relevant tests, and opens a follow-up PR automatically.
- Run agents in-browser: With qodo –ui, I can access a Web UI that adds structure and interactivity while debugging or testing agents.
- Use in CI/CD and internal tools: I trigger agents from GitHub Actions and internal bots. They return structured output logs, making them easy to monitor and integrate.
- Create and customize agents: With qodo create agent, I can scaffold agents and fine-tune their behavior using a .toml config. This includes setting input formats, output types, trigger rules, and allowed tools.
For example, I used Qodo Command web interface to review my directory’s latest changes. It first gets the full context of my directory as shown in the image below:
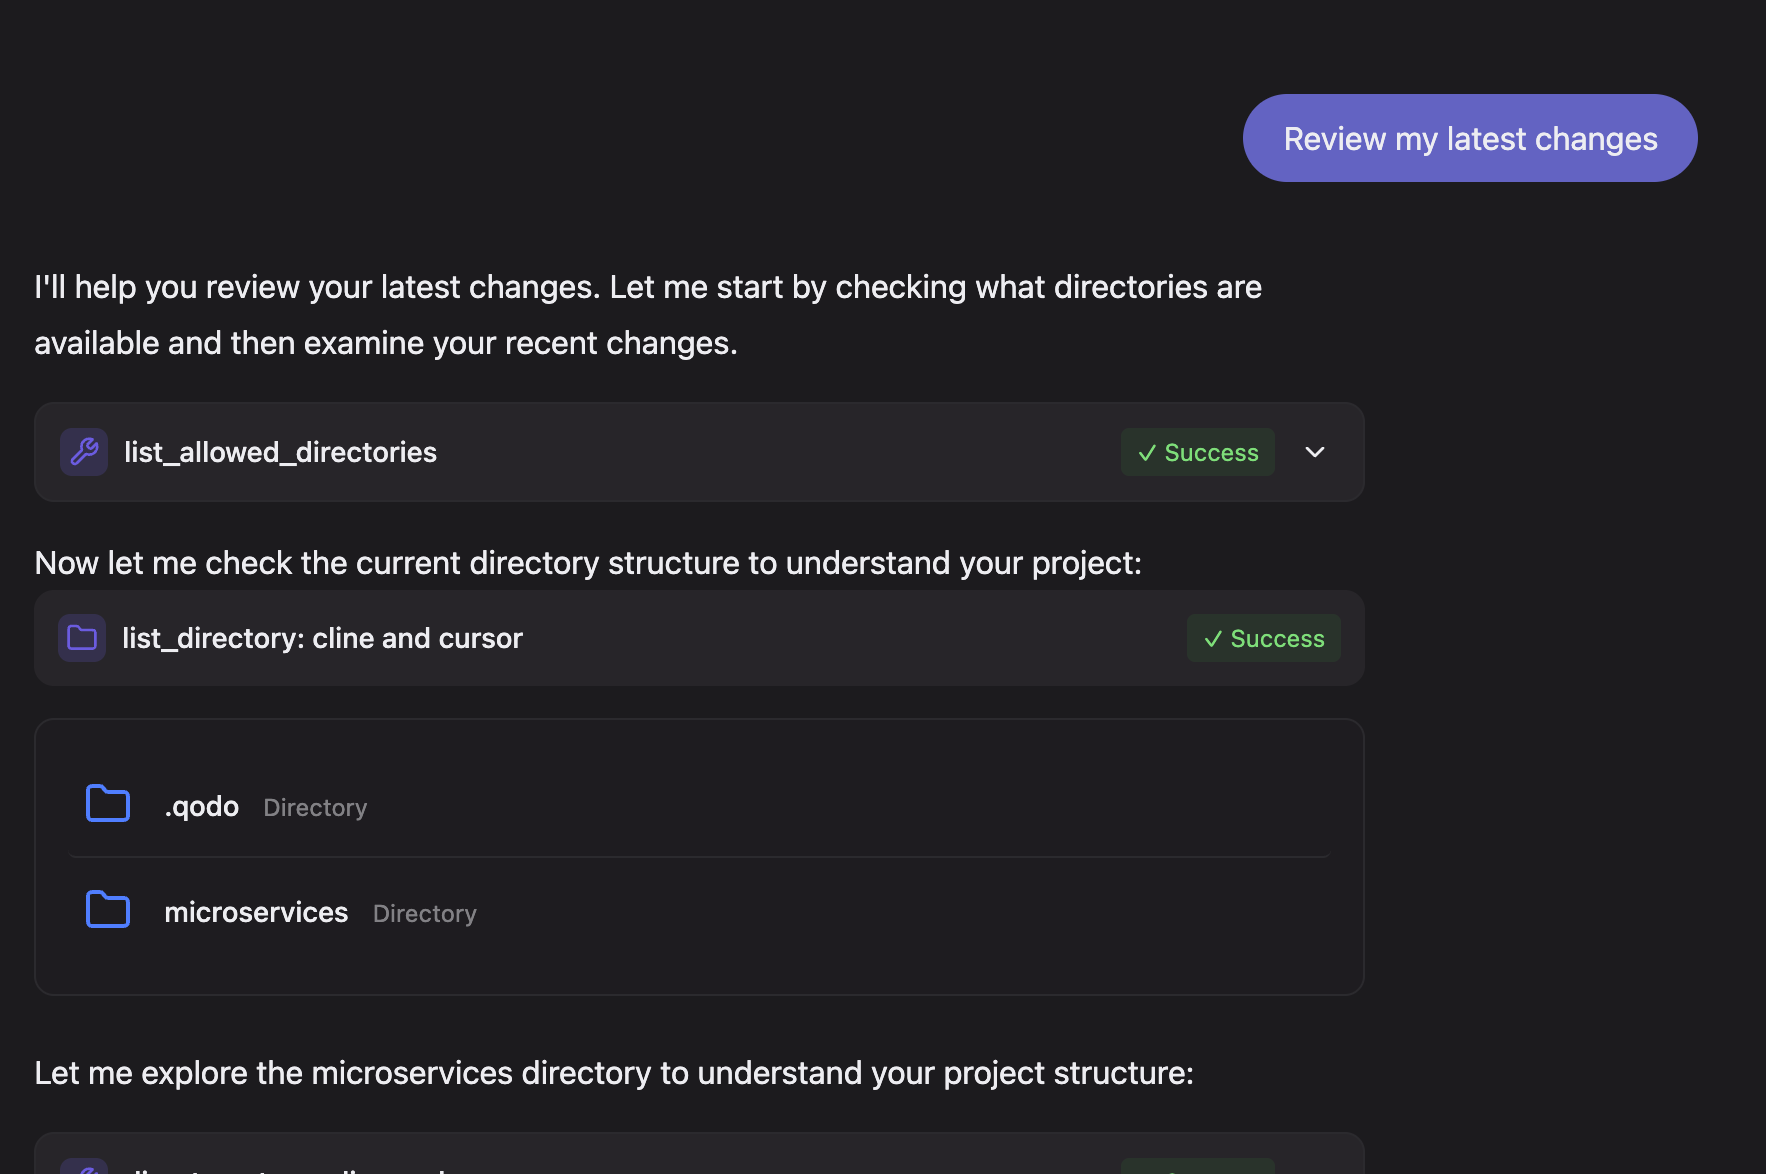
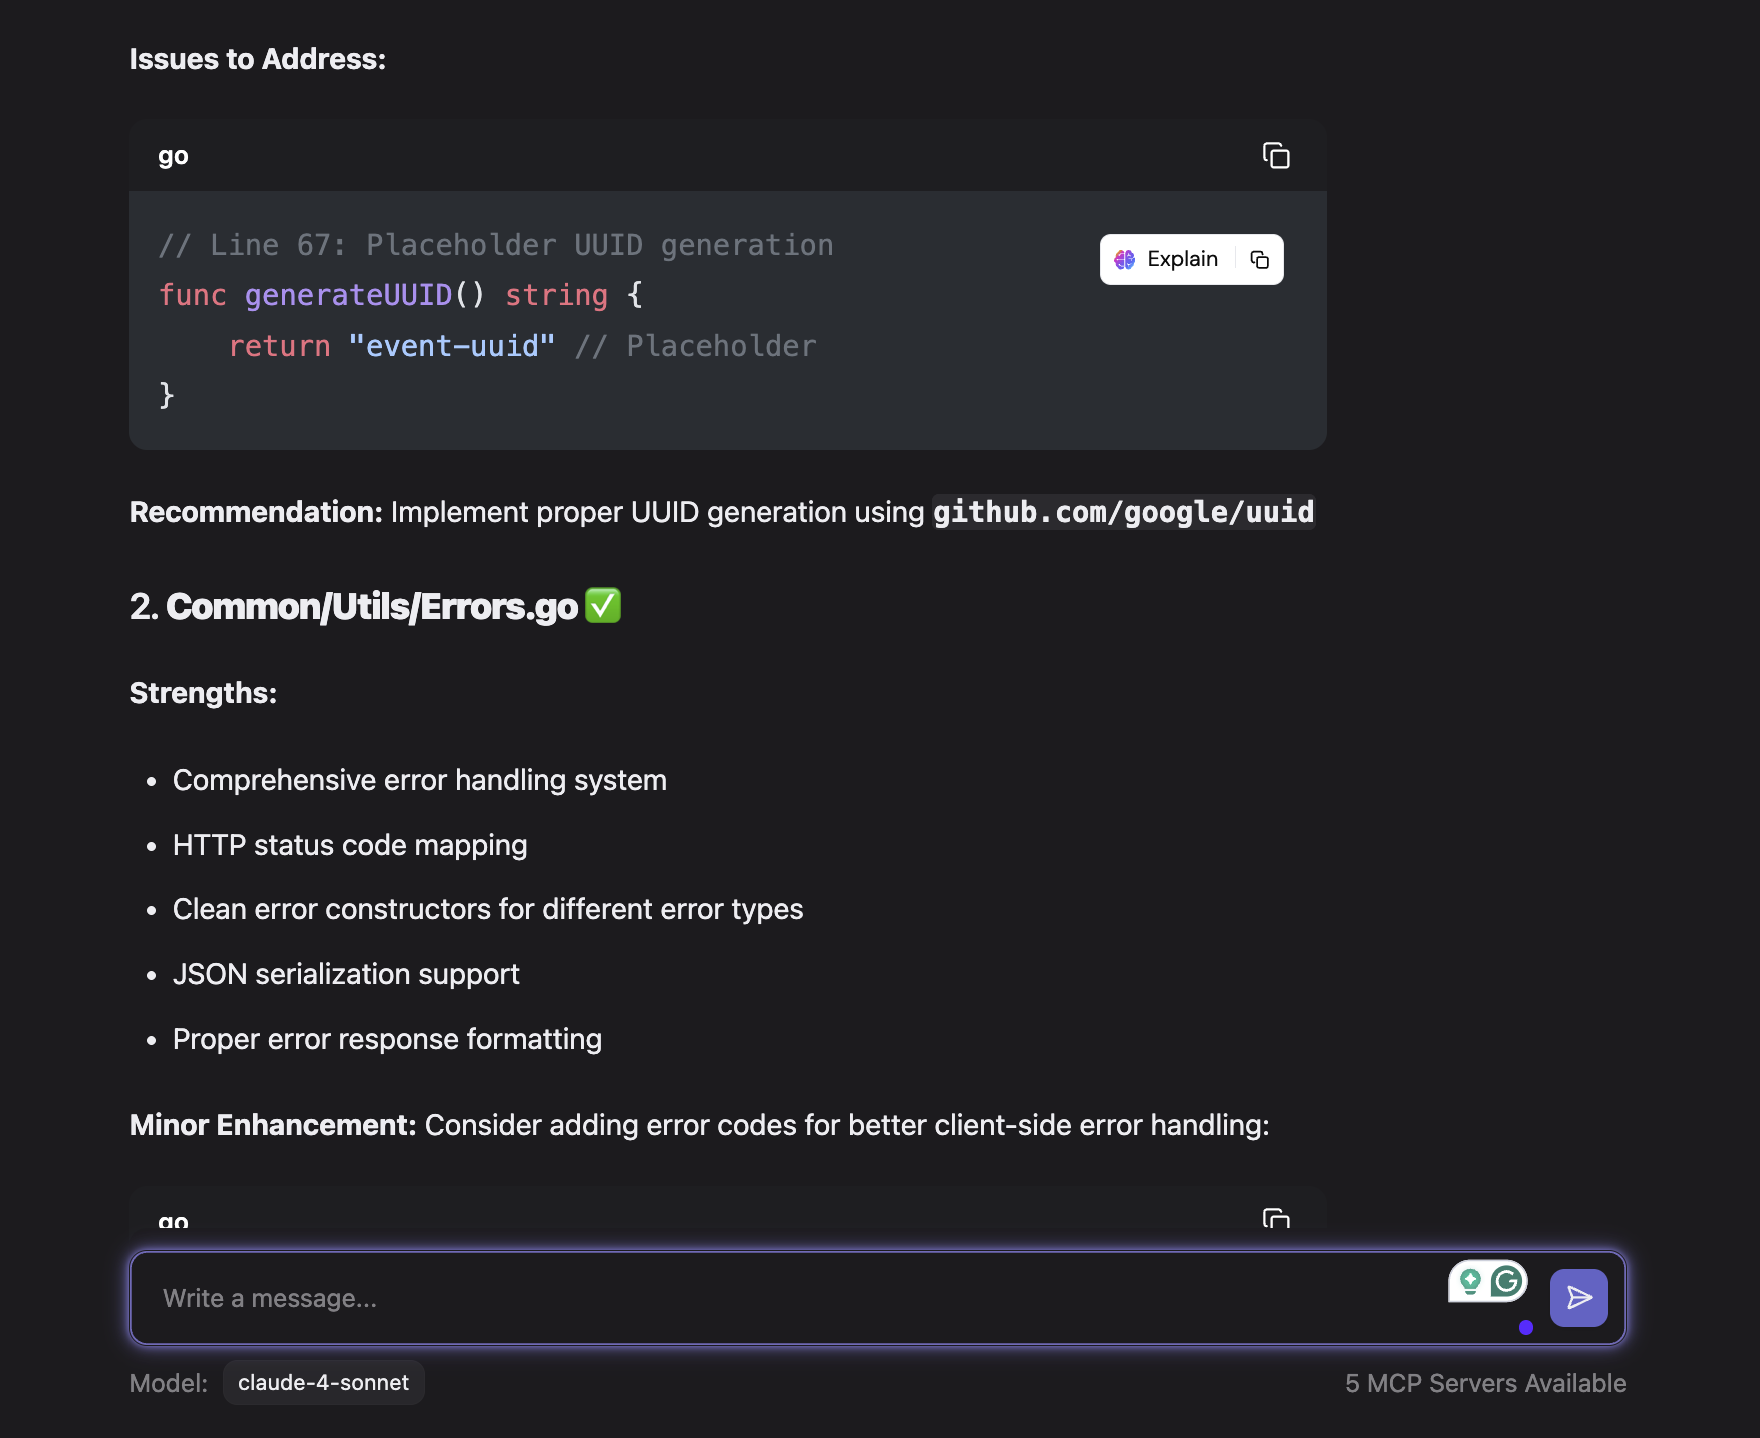
Qodo Command helped with code reviews by generating a structured summary that highlights both strengths and areas for improvement in a Go-based microservices project. It evaluates the project context, such as service separation, missing go.mod files, empty directories, and version control setup, and surfaces actionable suggestions in a clean, review-ready format.
In this way, I can easily use this CLI for other purposes too. For example, I’ve used it to automate test generation, trigger agents from CI pipelines, and even scaffold new agents with custom rules using simple .toml configs, all without writing extra infrastructure.
Conclusion
Building AI agents isn’t just about wrapping a prompt in an API call. It’s about designing reliable, context-aware systems that can act on your behalf across real developer workflows. Whether it’s summarizing code, debugging CI failures, or reviewing pull requests, the key is combining language models with structured context, defined goals, and access to tools.
You can start simple using GPT APIs with custom prompts and gradually move toward production-grade agents. For me, Qodo Command made that transition easier. It lets me define how agents behave, when they run, what they act on, and how they return results, without needing to build or host any new infrastructure.
From scripting basic tasks to running automated reviewers in CI pipelines, AI agents are becoming a practical part of software development. With the right tools and patterns, they’re not just assistants, they’re teammates you can rely on.
FAQs
What’s the best tool to build AI agents for developers?
It depends on the use case. For general-purpose agents, tools like LangChain or GPT APIs offer flexibility. But if you’re focused on developer tasks like PR reviews, CI diagnostics, or test generation, Qodo Command is a better fit. It’s designed for software teams, with built-in Git context, CI/CD triggers, and configurable agent workflows.
How can I create an AI agent using GPT or Claude?
Start with a simple script using openai.ChatCompletion or Claude’s API. Construct prompts with input files, relevant documentation, tool descriptions, and clear rules. Add logic to handle retries, token limits, and structured outputs. This lets your agent reason over inputs and return actionable results, like summaries or fixes.
Can AI agents run in CI/CD pipelines?
Yes. Qodo Command supports CI mode natively. You can trigger agents on events like PRs or failed builds. The agent reads diffs, logs, or config files, and returns clean, machine-readable output suitable for automation. It reduces reruns and helps surface issues earlier in the pipeline.
How is Qodo different from LangChain for building agents?
LangChain is designed for chaining LLMs with tools and memory, great for prototyping diverse agents. Qodo is focused on production-grade developer agents. It includes agent scaffolding, Git-aware context, TOML-based config, and execution modes like CI and webhook. This makes it better suited for SDLC automation rather than general agent logic.